On this page you'll find ideas & suggestions to overcoming problems with packaging, adjustments, solutions that have worked for others. You'll find Recumbent Trike Riders very willing to share the creative solutions many have dreamt up so don't be afraid to ask - we have all been there at some point in time.
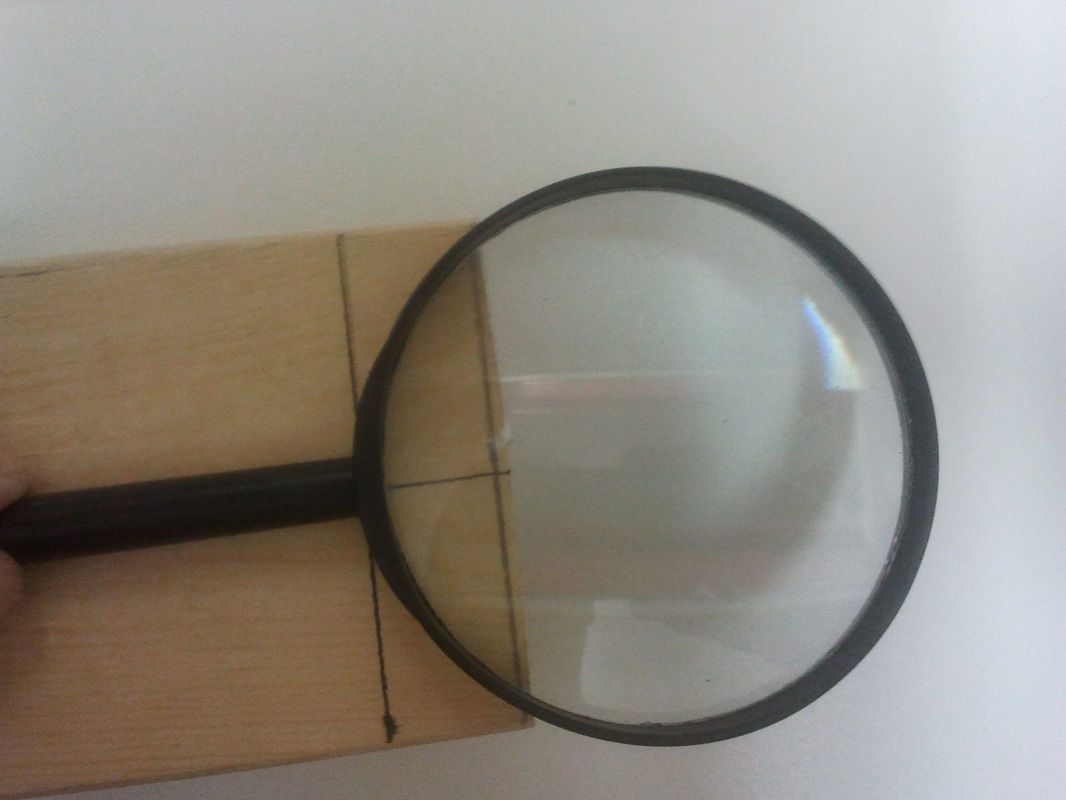
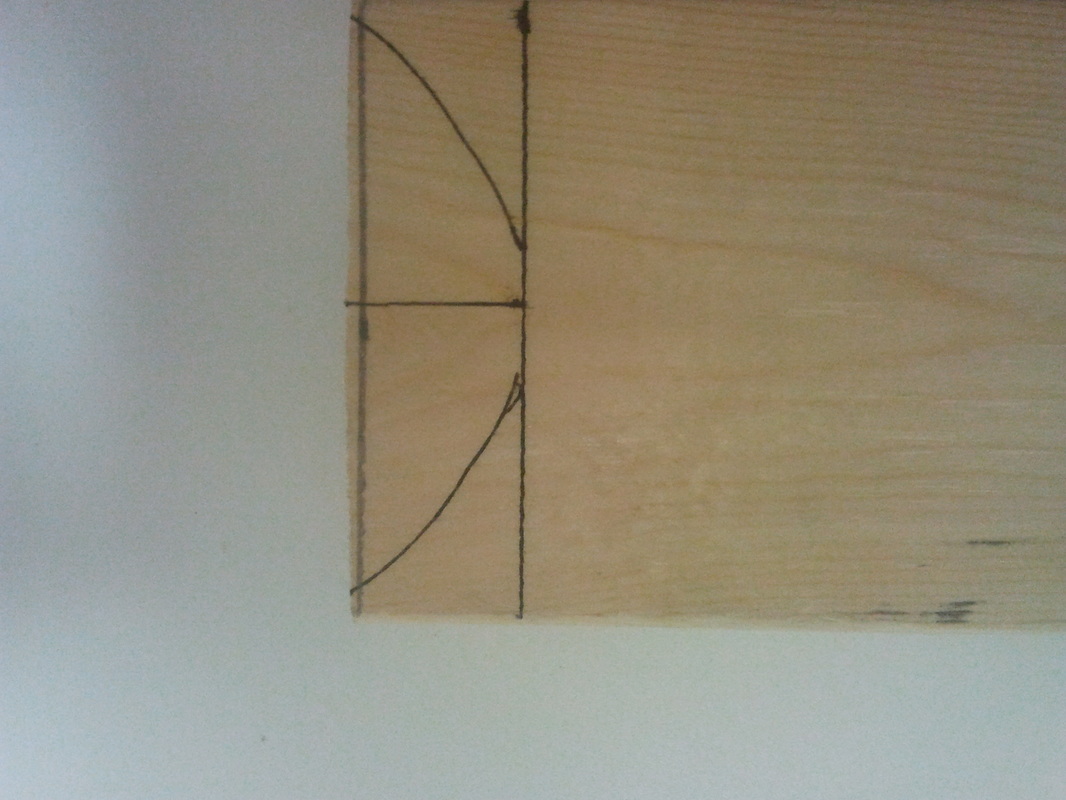
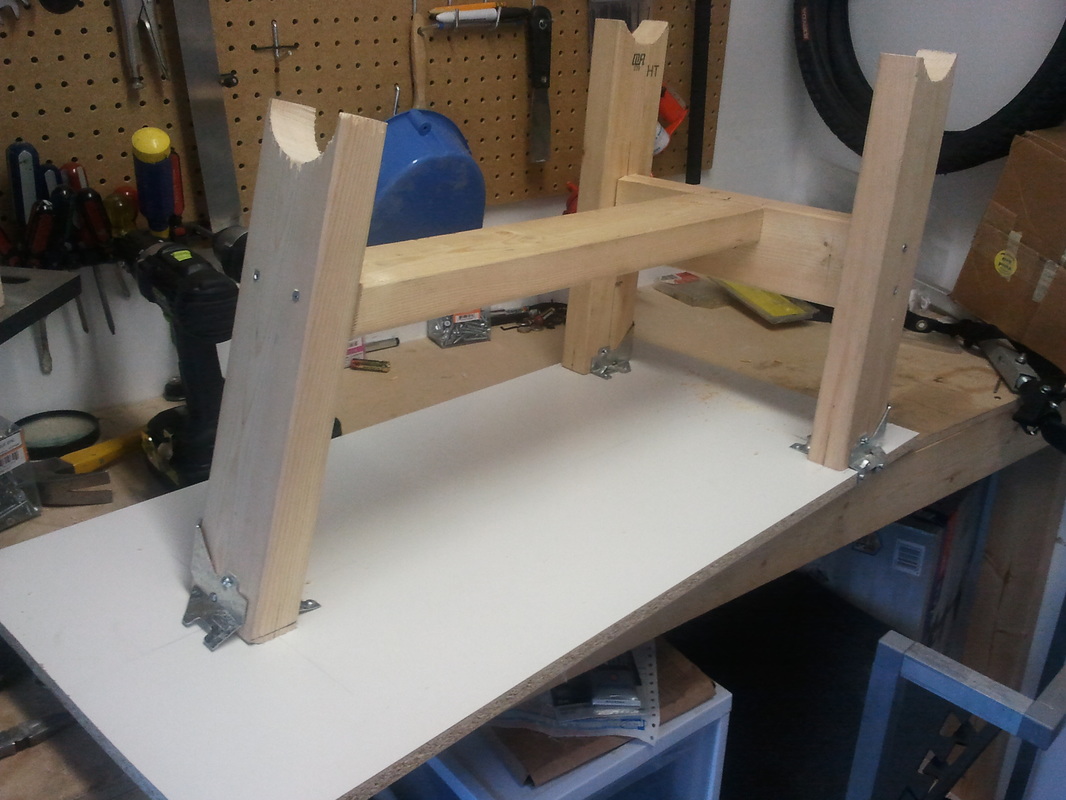
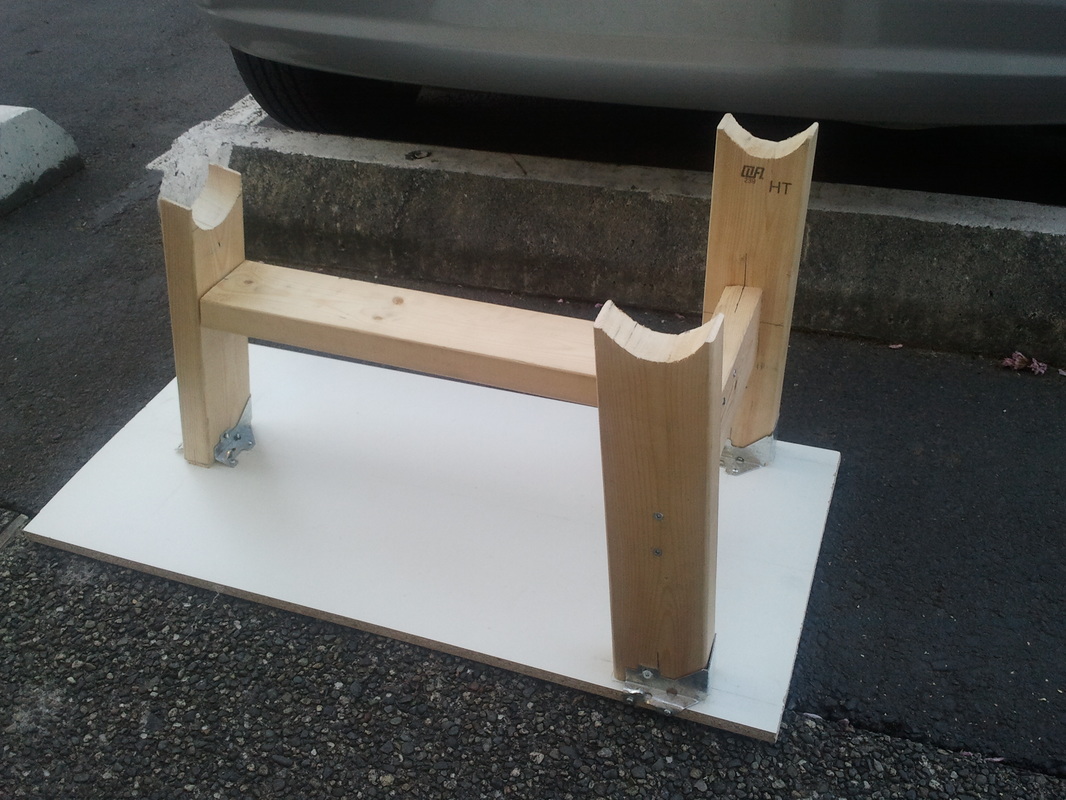
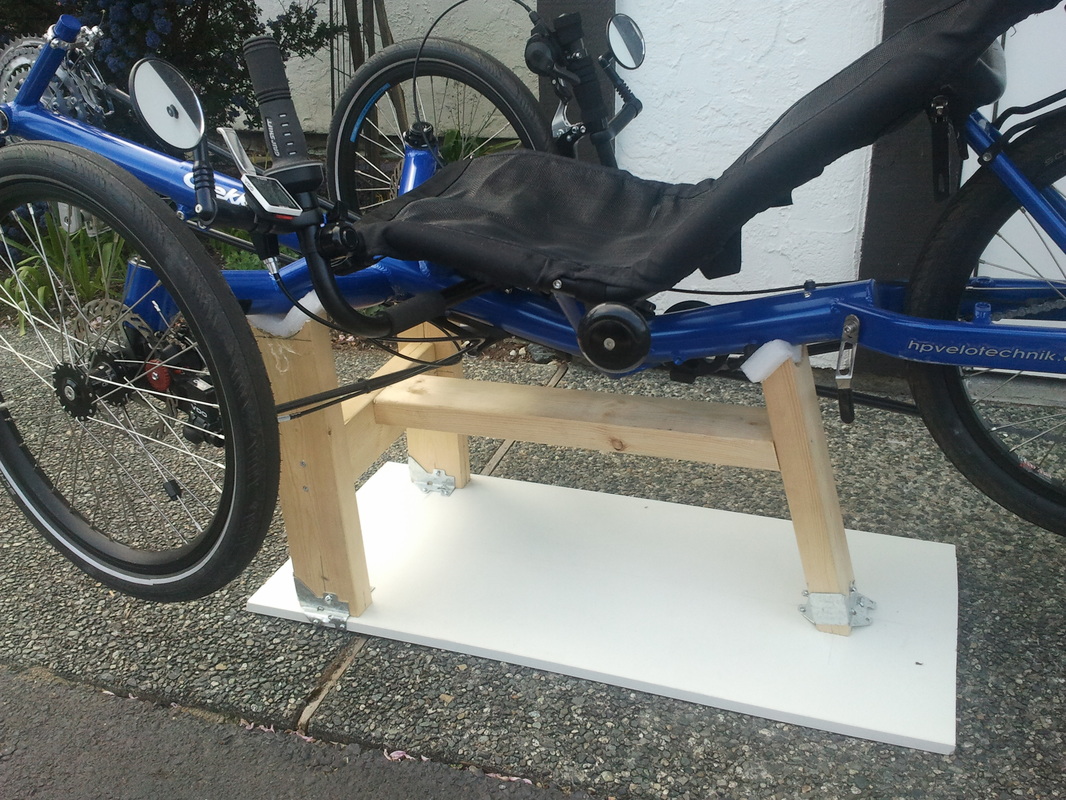
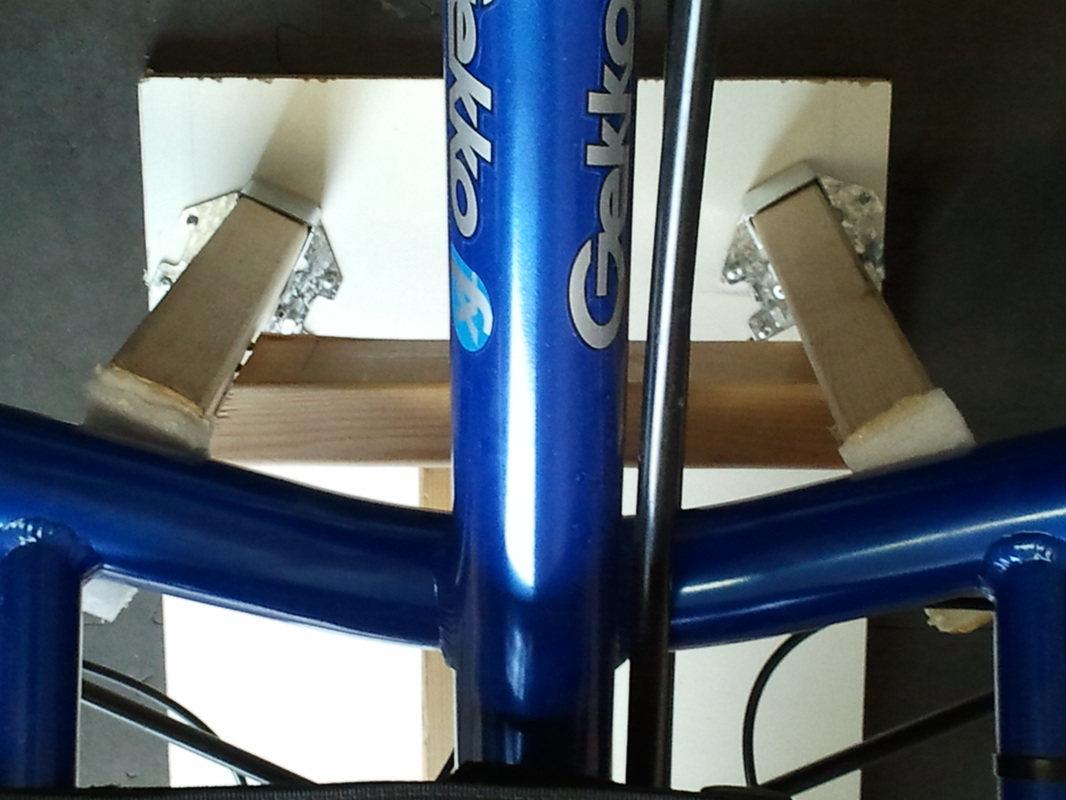
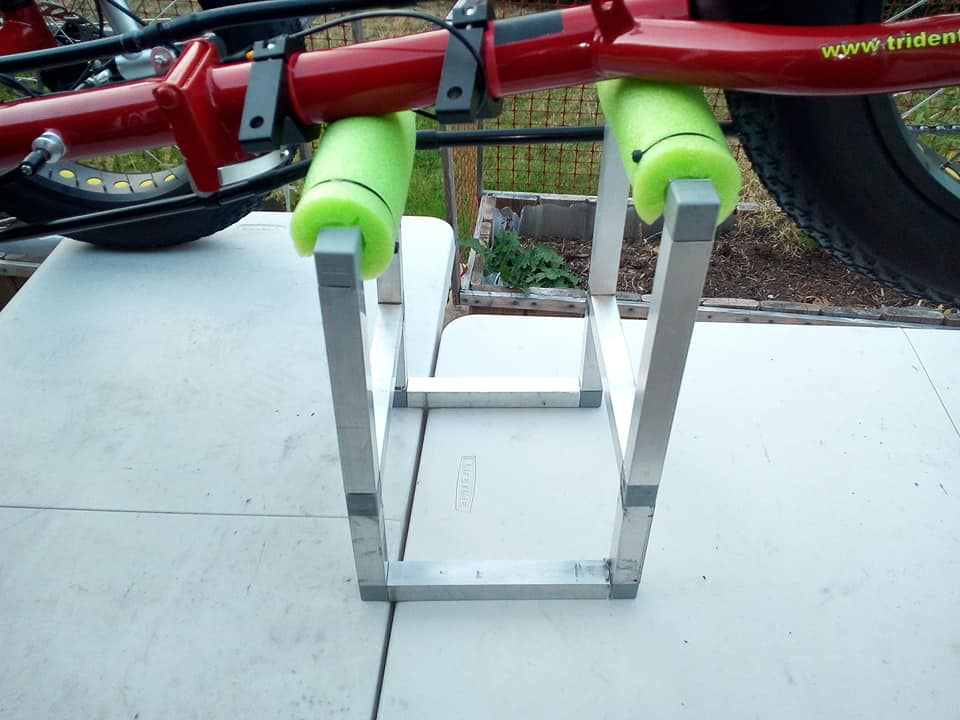
Homebuilt Work Stand -
Here's an easy to build, inexpensive work stand sent to us by ENJOY LIFE OUTSIDE
Homebuilt Work Stand -
Here's an easy to build, inexpensive work stand sent to us by ENJOY LIFE OUTSIDE
|
Be sure to sign up to Enjoy Life Outside's Youtube Channel for lots of tips & tricks & new videos. |
|


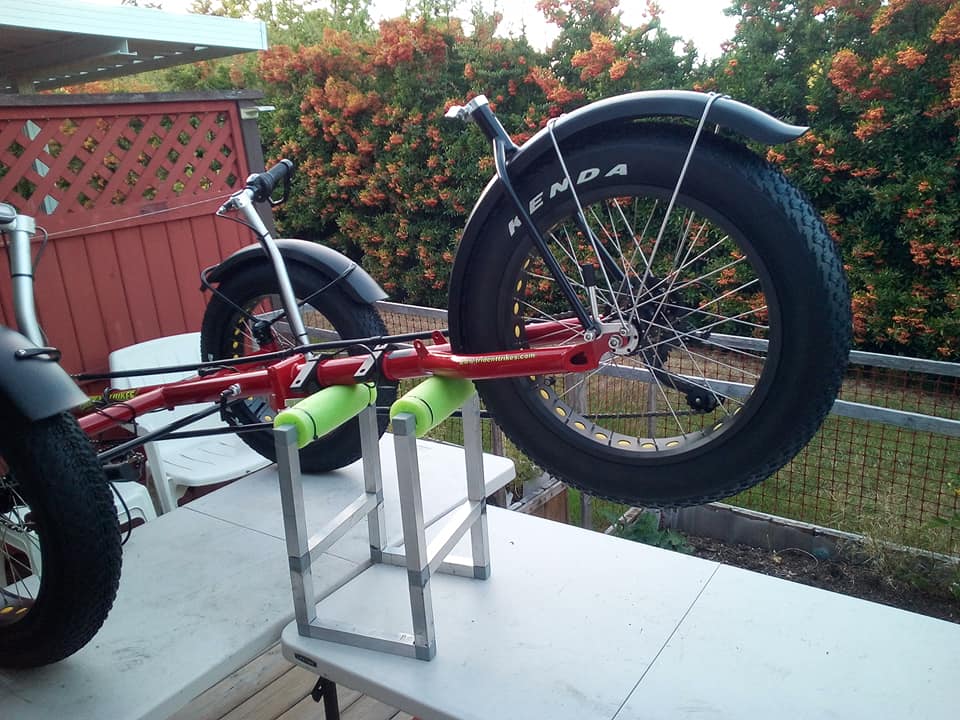
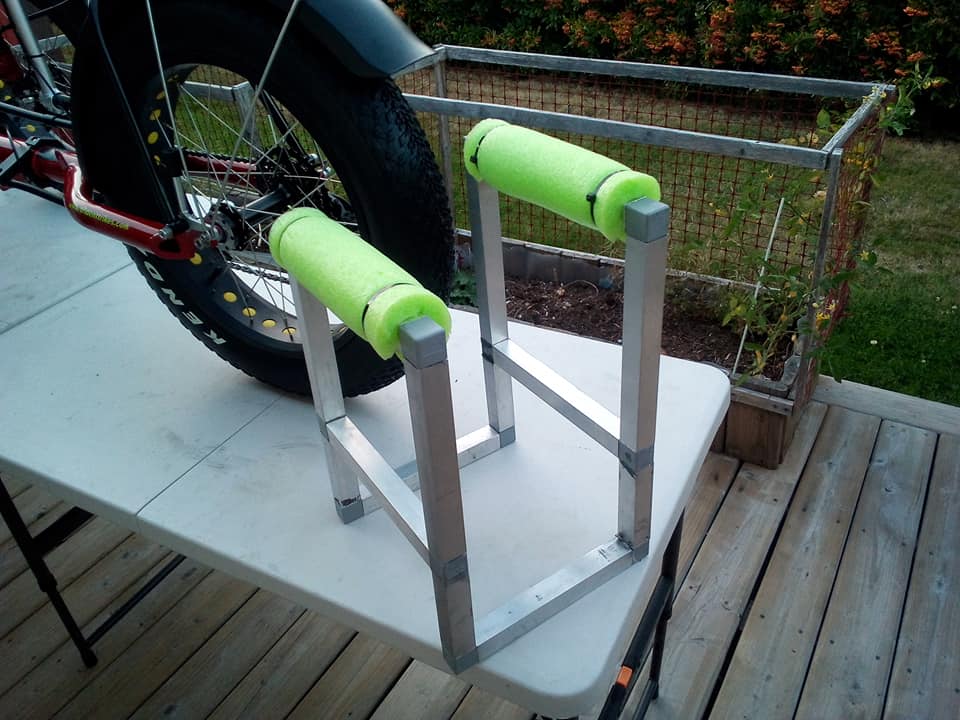
Here's an easy to make convenient support when you need to lift one wheel of your trike off the ground. Having been in the same situation trying to adjust or repair a trike & no one around to help, I decided to come up with a solution. Here's what I did. Find your self some offcuts of 1" square aluminum tubing. If you have to buy them get about 12 pieces under 12 inches in length. This should give you more than enough to cut 4 pieces 4 inches in length & the rest about 8 -10 inches long. You will also need 8 right angle tubing connectors & 4 T tubing connectors. 4 zip ties & an old piece of pool noodle. You should measure the height of your frame from the ground & add a couple of inches for lifting your trike clear. In my case I made one end of my stand 2 inches shorter to accommodate the upsweep in the frame & you can see in the photos I can probably drop the height another 2 inches. This will also give you the option of lifting one of your front wheels if needed. It's really a simple project & cost peanuts to make. Now I don't have to go asking around for someone to hold my trike up in the air when I want to work on it.
|
|
|
ELECTRIC TRIKES - Get in the habit of removing your key from your battery. Once you have locked your battery onto the rear rack you should only remove it for charging or doing maintenance on your trike. Never ride with your key dangling from the lock - if you lose the key on your ride you will probably never hear it fall out. Make sure you keep your spare second key in a safe place at home or in your glove box in your car.
ALWAYS EMPTY YOUR POCKETS - The Recumbent riding position may be comfortable & give you the best view of your surroundings but it is notorious for having things fall out of your pockets along your route. Take the experience & advice of those who have already spent countless hours looking for lost car keys or their wallets & put EVERYTHING inside your rack trunk bag before setting off.
PARKING BRAKES - Your trike should be equipped with a Parking Brake & this serves several purposes. It prevents your trike from rolling away obviously but it also serves to prevent your trike from being bumped into a position behind people standing around asking questions about your trike. I have seen someone so excited about finding out about trikes that they turn around to talk to someone else in the crowd & fall over a trike that had been positioned behind them. Your Parking Brake also serves to stabilize your trike when getting on or off. It avoids the embarrassing condition of falling into your seat awkwardly as you discover your trike has moved 12 inches away. If you have 2 Parking Brakes get in the habit of setting both in case your brake handle gets bumped & releases the Park function. Remember to release the brakes before riding off. Sounds obvious but you would be surprised how many times a rider thinks he is in a harder gear than he actually is & then realizes he forgot to release the Parking Brake.
LUBRICATION - One of the best things you can do for your trike is to make sure everything stays clean & lubricated. It helps prevent rust, extends the life of your parts & makes your riding faster with less effort.
Here are some things to check & lubricate:
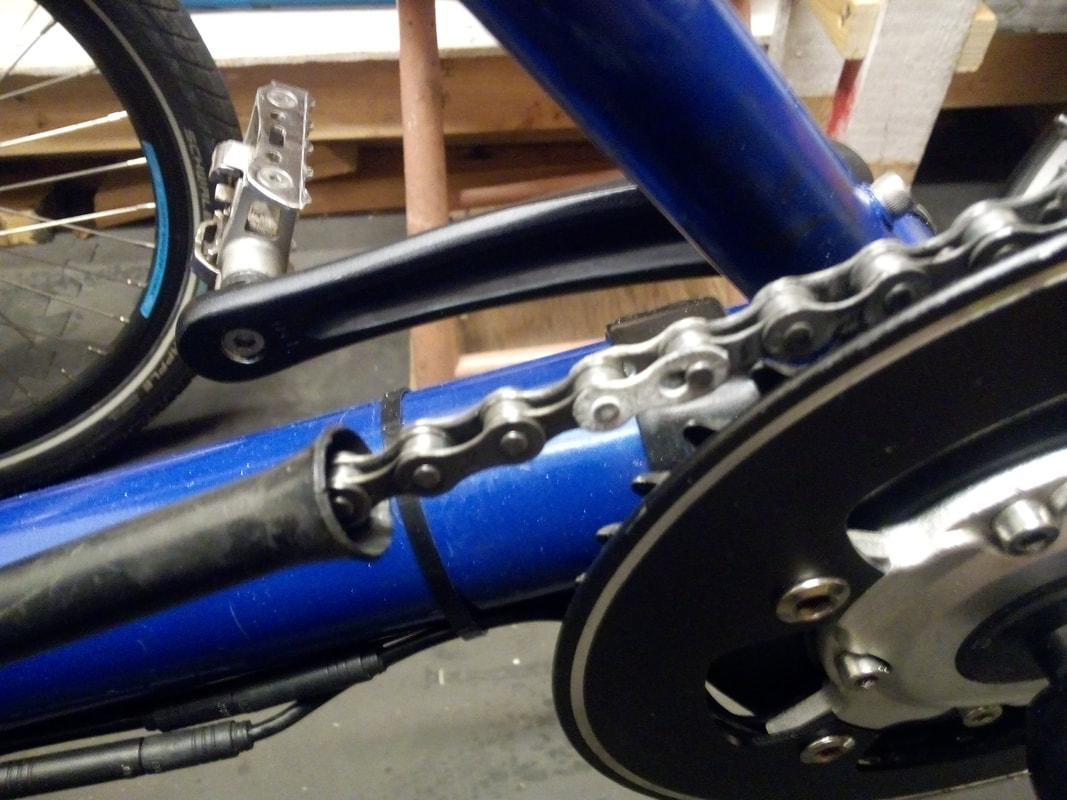
Chainrings & Gears - these are easy to keep clean BUT be careful of catching your fingers. Place cardboard under your trike to catch drips. Simply wear gloves & with a moistened rag with varsol, slowly rotate your pedals baclwards while saturating the gear teeth & chain with varsol. Do this several times using clean areas of your rag. The idea is to loosen as much dirt, grease & grunge out of the moving parts. To lubricate repeat using Auto Transmission fluid. ATF will bind to pits & scratches in the metal so you will want to saturate your gears & chain with the ATF. & let it sit overnight. Next morning clean all the excess off with a clean dry rag. The remaining fluid will have seeped into all the crevices giving you a much smoother running driveline.
FRAME PROTECTORS - Here’s yet another use for Pool Noodles. Cut your Pool Noodle lengthwise in half and use as a cushion on your work stand. You can keep them in place with tape, glued to your work stand or wrap them around your derailleurs, chain rings or anywhere you need protection when transporting your trike.
WATER BOTTLES - Here’s a simple trick that will keep you in ice cold water for the duration of your ride. Fill your water bottle 2/3 full & lay on it’s side in your freezer. Overnight works well. before you head out for your ride fill the last 1/3 of your water bottle & you will have ice cold water for most of the day.
AVOIDING OBSTACLES - Sometimes when riding along a quick decision has to be made to avoid a Pot Hole, Bump or Glass or other item that might cause you flat tires or cause you to have a sudden jolt. If there are several items on the road you may be faced with, "Do I go left or right?" You also have to consider where your back wheel will travel through the obstruction & a simple easy to follow trick is to line up either of your pedals to travel over the items you want to miss. This allows you to avoid having your front wheels & your back wheel run over the bad part of the road.
Making your Panniers fit - Sometimes your rack design or the size of your bags don't allow sufficient tension for the hook bungee cord to properly match up with your rack. There is an easy solution though. You will a need 2 square pieces of 3mm thick plastic to comfortably cover the mounting area of your bags. Should be something like 4 in./10 cm square but measure to make sure. This can be an old cut up plastic storage box, piece of scrap sign material. Ask for a small piece of Sintra Plastic at a Sign Shop, it will take the vibrations better & not shatter or crack. Follow the steps below to re-position your hooks.
(Photo #1) - You can see the problem here. The Bungee Hook is below the Hook Bar on the rear rack.
(Photo #2) - First remove your bag from the rack & measure the distance from your top rail down to the hook bar on the side of your rack.
(Photo #3) - Then measure the distance from UNDER your top rail bag hooks to your bungee hook. This distance needs to be less than the distance measured on your rack. Make it about 1 inch less.
(Photo #4) - Using your existing Support Plate from inside your bag you can use it to mark the new hole position accurate spacing.
(Photo #5) - Take out the nuts, bolts & washers that hold your existing hooks in place. You will likely have a support piece inside your bag. Use that as a template for marking the size & holes on your new mounting plate. Remember to shorten or lengthen the bottom holes as needed for the 1 inch position difference of your hook.
(Photo #6) - Mount your new mounting plate on the outside of your bag with the original mounting plate on the inside. You may need slightly longer bolts for the original holes & you are ready to go.
Photo #6 shows a temporary fix so the nuts didn't mark up my paint. A better solution is to use Acorn Nuts.
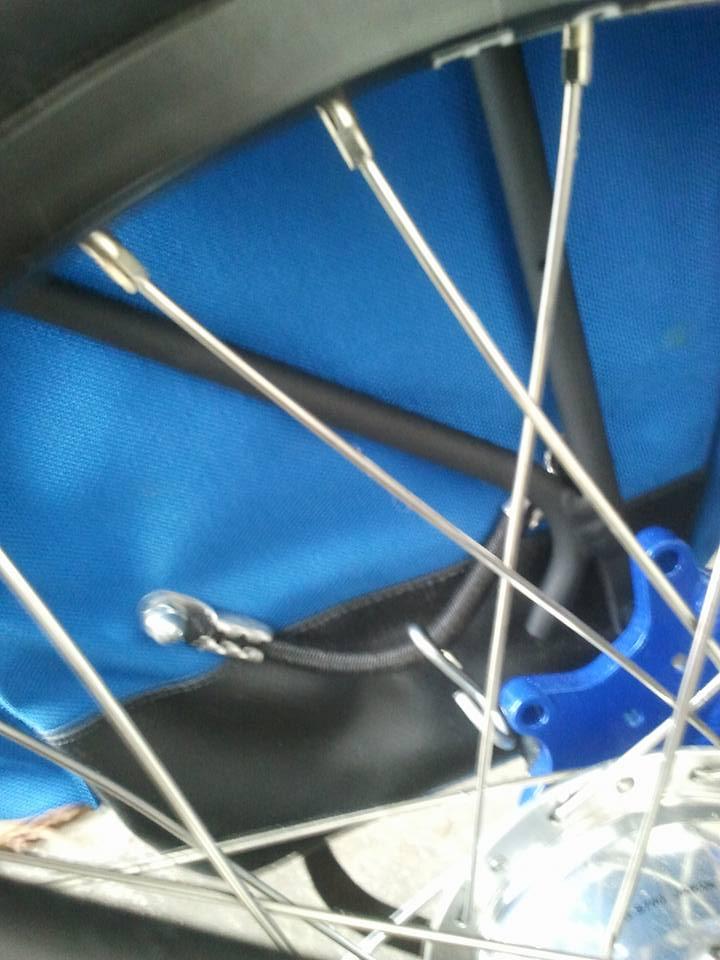
Photo #1
|
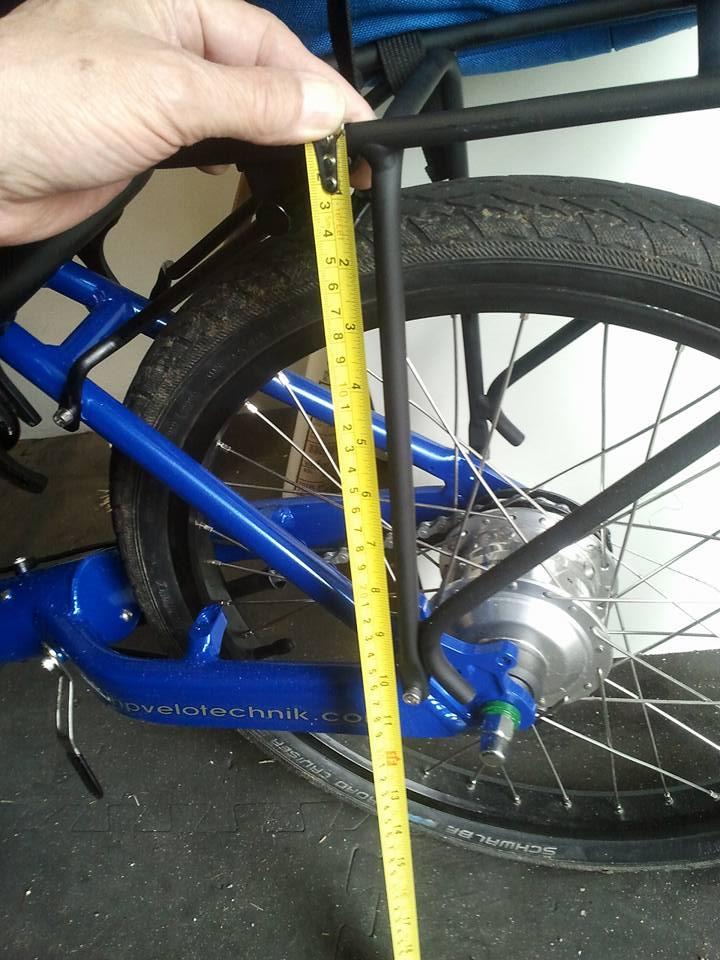
Photo #2
|
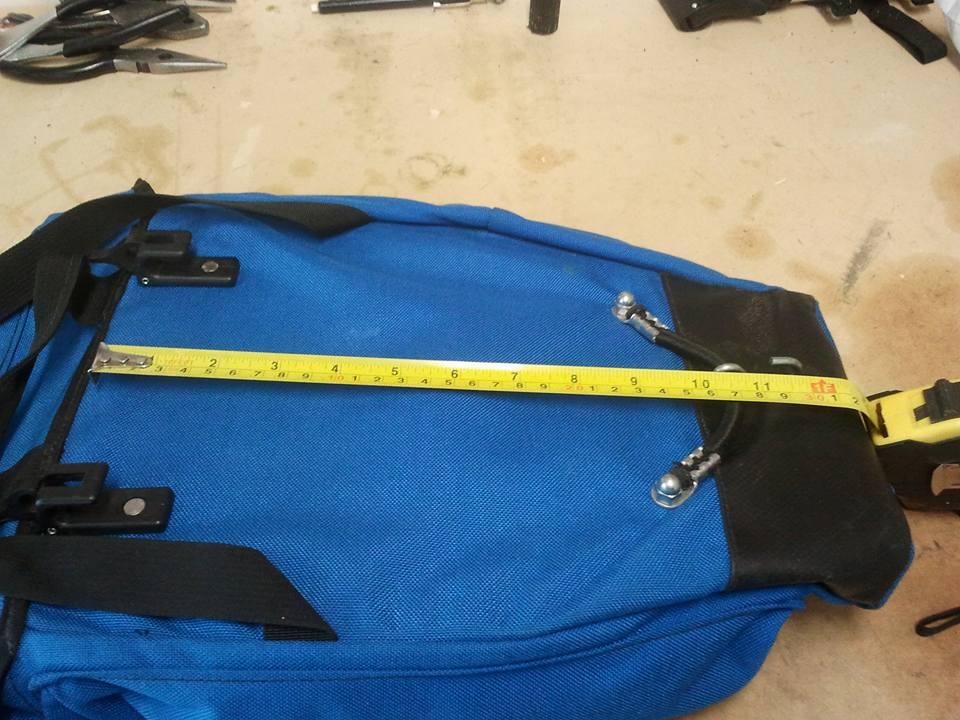
Photo #3
|
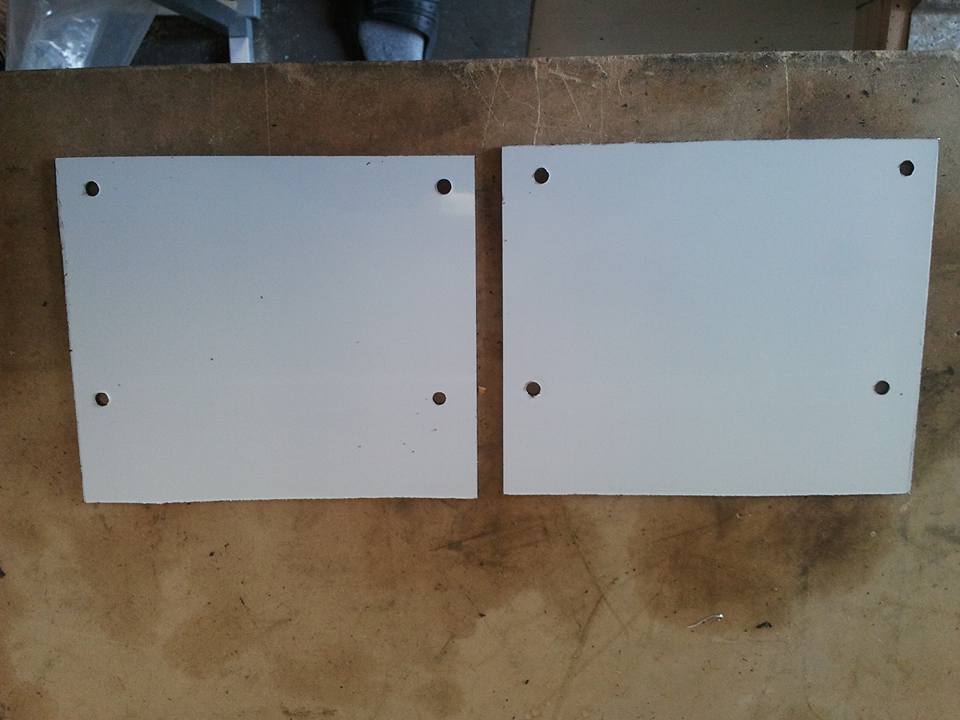
Photo #4
|
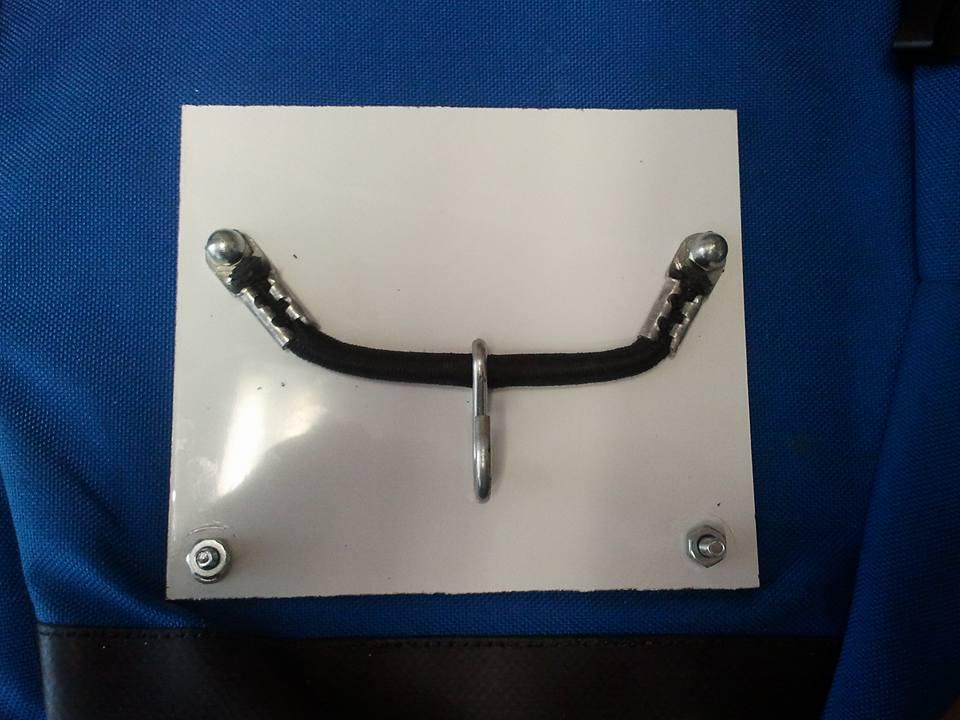
Photo #5
|
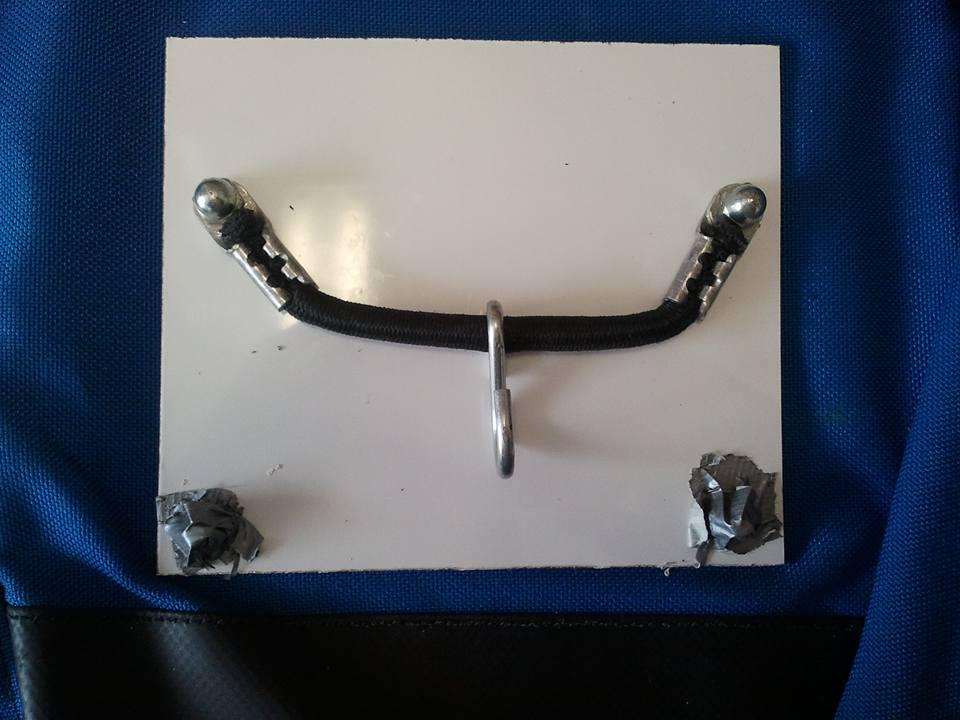
Photo #6
|
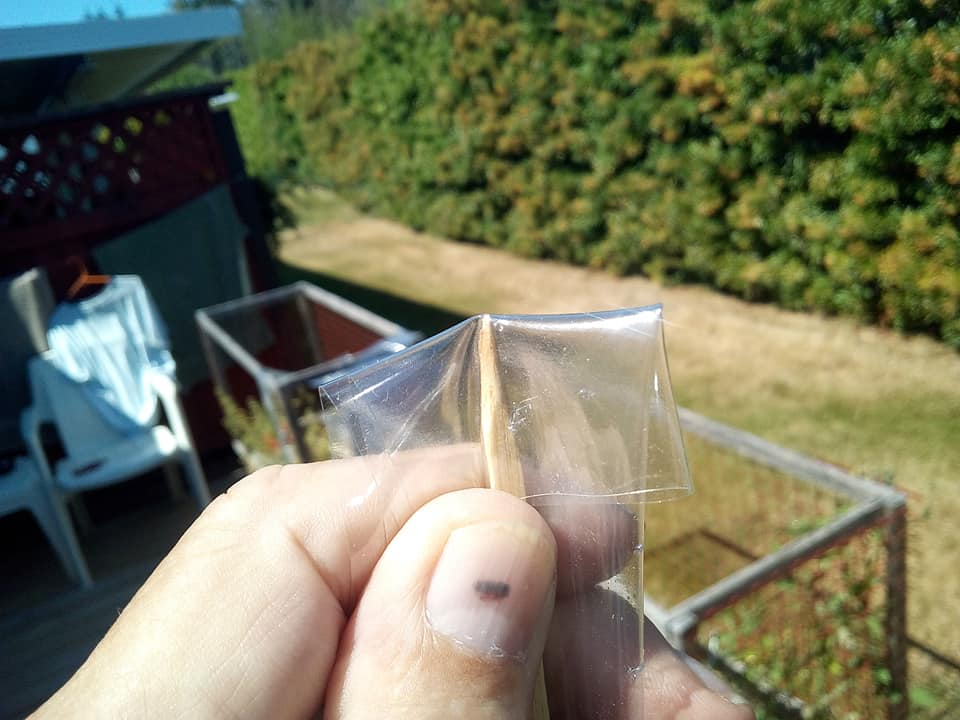
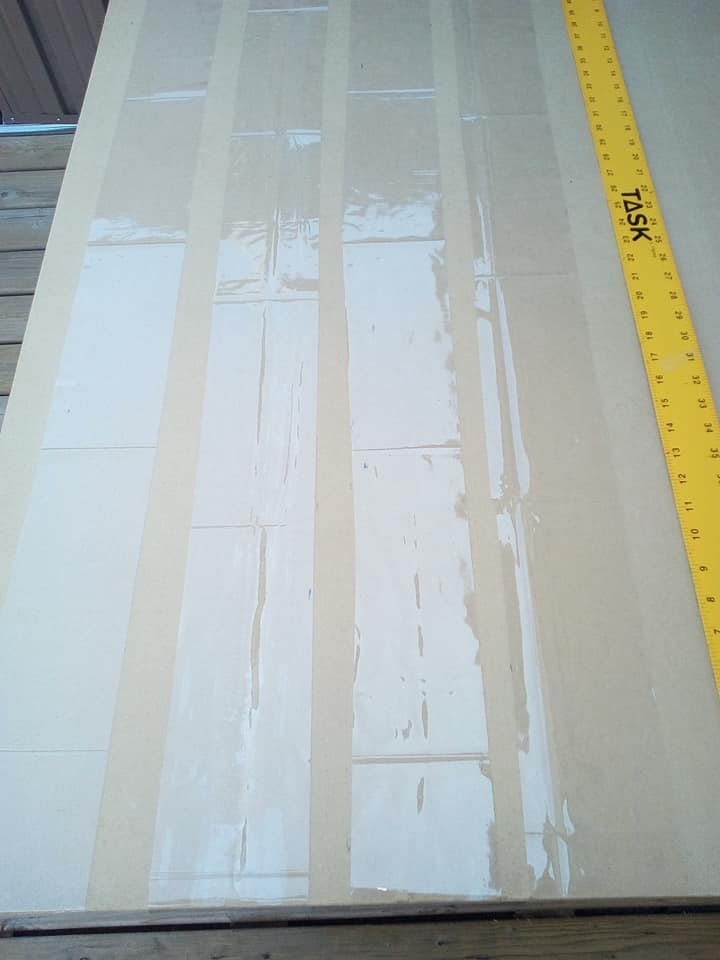
Fat Tire Liners - Fat tires seem to be susceptible to thorn punctures & other causes of flats. You can buy Fat Tire Liners but at a cost of about $50. each, that is a little excessive to me. Here's what I did for 1/10th the cost. -
You need to find some heavy guage Polyethylene & make sure it is the soft, flexible type. This comes rated in 'guages' which makes it a little confusing so just ask for the heaviest 'Guage' you can find. It will most likely be 2 or 3 mm thick which is fine but if you can buy 'Off the roll' 6 mm that is better. I ordered one of those heavy 'guage' clear tablecloth covers from Amazon. Ebay, Walmart or your local hardware store might also carry them. At a cost of $12.00, I thought if it doesn't work it's not a big deal.
Here's what you need to do -
How Much Poly do I need? - Get a length of string to measure the outside perimeter of your tires. If you have 3 x 20 or 26 inch tires you only have to do one wheel. If you have a 26 inch back wheel you will have to do that one as well as the smaller front wheel. Carefully measure the length(s) of your string - this will give the length of your tire liner needed as well as the correct size sheet of polyethylene. You can overlap the strips of tire liners if your sheet of poly is slightly longer than the perimeter of your tires.
What width? - If your fat tires are the common 4 inch width, this is what you will cut your poly strips to. If you have 3.5 or 4.5 wide tires, then cut your strips accordingly.
Cutting your Liners - You may find it easier to lay your sheet of poly on a large table, measure your liner widths needed in several places along the length of your poly sheet to keep your strips as straight as possible. The poly can bunch up on you while cutting. if you can have someone hold the poly to keep it flat while you are cutting the strips. It will help a lot.
With my vinyl poly tablecloth I had enough material to double up on my liners so that gave me 2 - 3 mm thick strips for each wheel. Static electricity seems to keep the strips from moving around so that was a lucky design bonus.
Inserting your liners - To insert your liners into your tire will take a little patience.
The following tips should help -
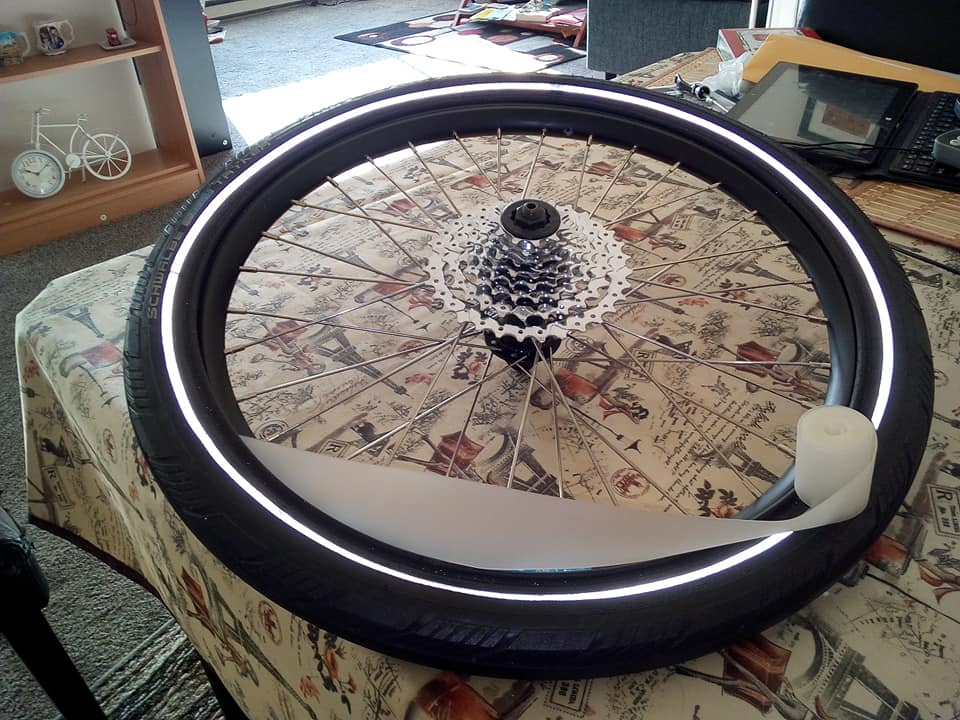
- With your wheel laying flat on it's side, deflate your tube. Have one bead / sidewall of your tire released from your wheel.
- Partially inflate your tube. Just enough so it takes the shape of your tire.
- Position your wheel with the valve stem at 12 O'clock.
- Take your tire liner(s) & if you are doubling them up, do it before trying to insert into your tire. Get them as even & smooth as possible.
- Fold your liner in half, to find the half way point of your liner. This center point will be positioned behind your valve stem at 12 O'clock. This is to ensure you do not end up with several thicknesses of overlapping liner behind your valve stem.
- Lay your tire liner(s) on your wheel remembering to position the center point at 12 O'clock.
- Starting at the 6 O'clock position gradually tuck the liner inside your tire between the tube & tire casing. Move equally up both left & right sides of your tire.
- You will probably find that parts of the liner will drop out of your tire as you move up the wheel. This is where a little patience comes in. Gradually, as you move up both sides of the wheel & replace the liner that has dropped out, it will all stay in place behind your tube.
- Make a final check all around that the liner(s) is centered on your tube & tire & then re-install your tire onto your wheel. Inflate to your correct pressure & you are ready for the next wheel.

|
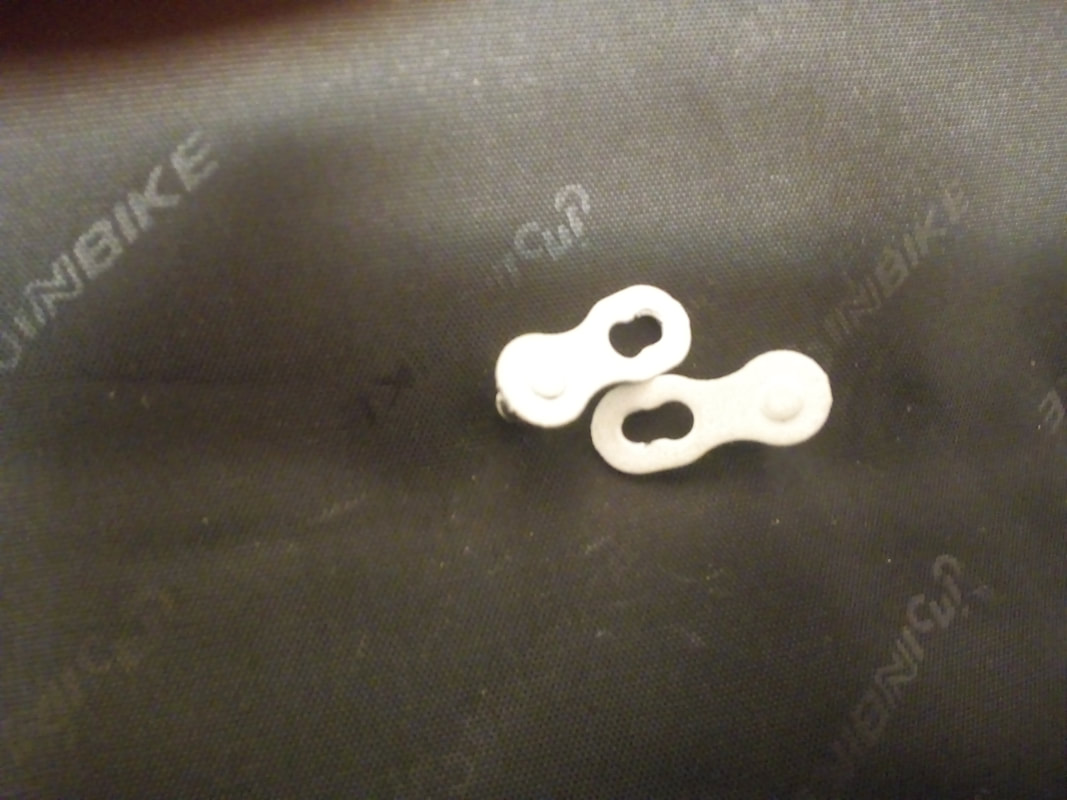
Quick Link Tip:
Here's a little tip that just might save you from spending 10 minutes looking for your Quick Link. The next time you are servicing your chain or have cause to remove your quick link, give it a shot of high visibility spray paint. Yellow works well but any bright colour will do. Makes it quick & easy to spot on your chain even if your chain is covered in muck. |
|
|
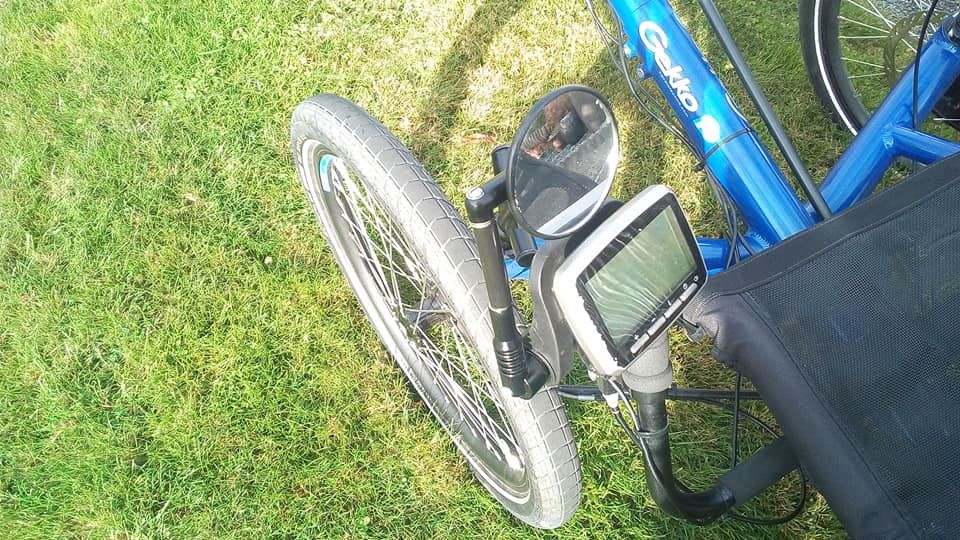
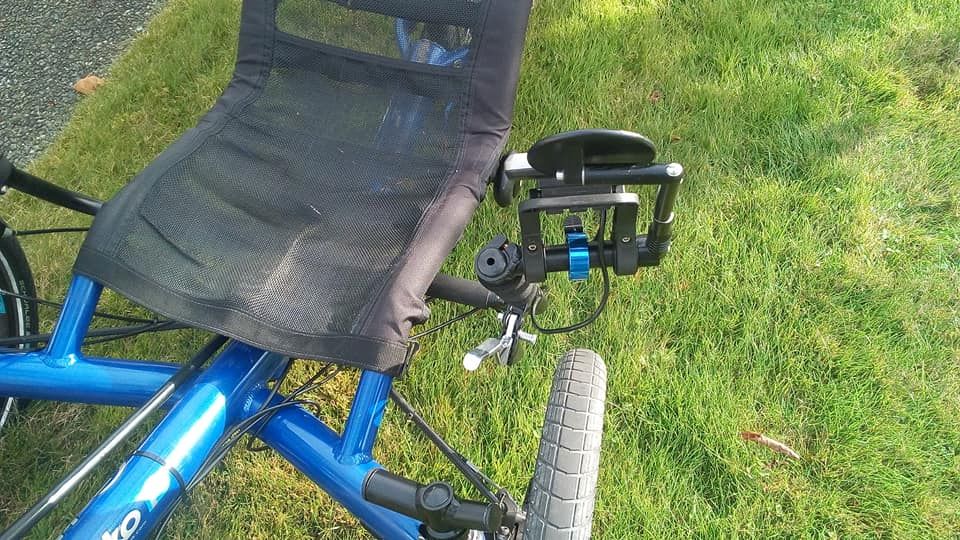
Mirrycle Mirror Mod
|
If you have trouble fitting your trike through Trail Gates due to the width sometimes the mirrors can take a beating or need to be folded in & out which can eventually weaken the fittings. Here's a tip I used to bring my mirror in & up & still be at a useful height.
What you will need - a piece of clear 1/2 " d. Plexi tubing cut to the length you wish to raise your mirror. In my case it was 3 1/2 " to raise it above my LCD Display. A long 8 x 32" threaded screw approximately 1/2" longer than your cut piece of tubing. (8 x 32 is the thread of the brass fitting in your mirrycle mirror) Some black Tremclad spray paint & a couple of extra washers. I sprayed the inside & outside of the plexi tubing in case the paint peeled but it seems to have held up fine. Just assemble your mirror in it's new position as in the photos. |
|
Helmet Visor Mod
The visors on most bike helmets are pretty useless but here is a simple addition to give you a visor that actually does what a visor is supposed to do. - What you will need - you can order a visor for a motor cycle helmet off Amazon or Ebay for less than $10. & there are usually several colours to choose from. You will also need three snap fasteners of the correct size. These you can get from a boat upholstery, awning or a craft shop but double check the size will fit the existing fasteners on your visor. You will also need a small amount of 2 part epoxy to attach the snaps to your helmet. Start off by positioning the visor where it will sit on your helmet. Mark the center snap position as this one is fixed. Apply the snap to the marked position & let it sit overnight to fully dry. Next morning you can attach your visor to the center snap to hold it in place while you mark the other snap positions. Repeat the epoxy & snap application, let them fully dry & you now have a decent removable visor for your helmet. |

|
|
PROTECT YOUR LCD DISPLAY Most LCD Displays are water resistant but not fully waterproof. Consider them similar to your Cell Phone & should be kept out of water exposure as much as possible. We all know our West Coast weather can get you caught in a sudden down pour so this little hack can save your Display. Keep a sandwich bag & a couple of rubber bands in your trike bag for those rainy days to cover your Display. You can still see your Display & operate your buttons through the sandwich bag. |
|
